Showing posts with label recipe. Show all posts

Saturday, 11 January 2014

Baked: Earl Grey Shortbread Cookies


I used Clipper Earl Grey tea leaves because it is strong, aromatic, and most importantly fine. If you have the original Earl Grey loose tea leaves, you need to put it into a food processor first because the taste will come through when the texture is fine.

(Note, for cupcakes / cakes, earl grey are usually melted and cooked in butter for the flavor to come through. For cookies, fine tea leaves would be sufficient)


What the batter looked like before putting it into the oven. Sorry for not editing the lighting!


What the shortbread cookies looked like after coming out of the often... As you can see, they are quite thick. Try to get them to be slightly less than 1cm in height when you pop em into the oven.

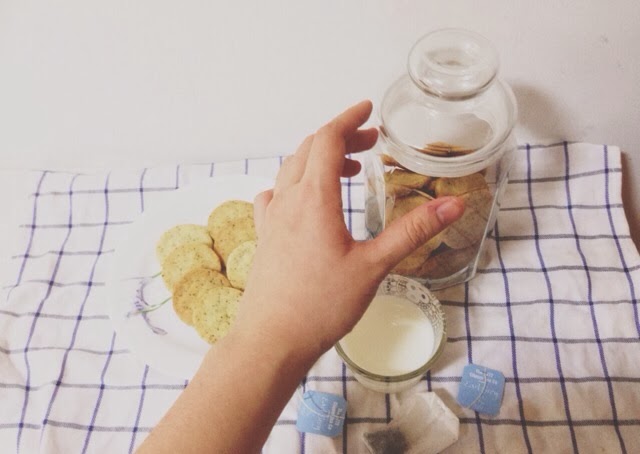


Earl Grey Shortbread Cookies (Makes about 45 bite-size pieces)
- 2 1/4 Cups all purpose flour
- 2 teaspoon of earl grey tea leaves (fine)
- 3/4 cups of caster sugar
- 1 teaspoon vanilla extract
- 1/2 teaspoon salt
- 1 cup of butter (room temperature)

Instructions
1. Mix the the butter (must be room temperature) with the sugar for about 5 - 7 minutes (you can use electric mixer on low or by hand because cookies do not have to be extremely smooth like cupcakes/cakes)
2. Add the vanilla extract, mix well.
3. Add the flour and the salt in, until it is slightly tough and easy to knead.
4. Lastly, put in the fine earl grey tea leaves into the batter. Mix with spoon (do not use electric mixer here because you might change the texture of the batter)
5. Knead. Yes, knead. I tried to use my non-stick roller pin to no avail. Knead the dough because it requires warmth from the hands. Knead for about 10 minutes until the dough is slightly 'flexible' but firm.
6. Make the dough flat (about 1cm in height for your own convenience) and put in plastic wrap. Refrigerate for only 20 minutes*. Anything beyond that makes the dough really tough and requires more time to thaw before baking.
7. Have fun cutting them out and bake them at 360 degrees F or 180 degrees C for about 12 minutes until edge becomes golden brown.
8. Leave it to cool on the parchment paper for 5 minutes, before putting them in cooling racks.

P.S. I will be trying earl grey BUTTER cookies in the future, but I need to get on experimenting matcha and tiramusi cupcakes because it was highly recommended by friends who would like to try and order :). 

Hope you guys will like this recipe! Enjoy with tea, milk or coffee in the late afternoon. Cheerios 

*Note: The reason why you need to refrigerate for 20 minutes, cut them out and pop em into the often is to make sure that the cookies are consistent. If you put them in the refrigerator for too long, then the dough might rise and you will have uneven cookies when you bake them in the often. Although this only affects cosmetic purposes, the taste is still the same.

Friday, 8 November 2013

Baked: Teh Tarik Cupcakes


I went to phoon huat (specialty bakery store) just to get my M1 / Open Star Tip / Rosette Tip just to make the frosting look like this. It's such a hype nowadays and of course... I wanted to jump into the bandwagon (: First time baking Teh Tarik Cupcakes, and I'm pretty satisfied with the results. Hurray!


Recipe: Teh Tarik Cupcakes

Teh Tarik Cupcakes (Yields 10-12)
- 1/2 cup butter (room temperature)
- 3 eggs
- 1 cup plain flour
- 1 teaspoon vanilla essence
- pinch of salt (optional)
- 2 packs of teh tarik mix (each pack was 40g)
- 4 tablespoon of hot water
- 1/2 cup white sugar
- 1/2 cup brown sugar
- 1/4 teaspoon bicarbonate of soda
- 1/3 teaspoon baking powder

Instructions:
1. Pre-heat oven at 175 degree celcius for 20 minutes.
2. With the soft butter at room temperature, mix with the white sugar and brown sugar. Mix well until it has a consistent texture. Whisk 3 eggs and slowly mix into the wet mixture. Add the vanilla essence. Mix slowly.
3. Sift in plain flour with baking soda, bicarbonate soda, and salt. Slowly mix into the wet mixture little by little.
4. Use the 4 tablespoon of hot water and dissolve the Teh Tarik Sachets. The consistency should be peanut butter-like. Add into the mixture bit by bit and slowly mix.
5. Use the mixer and put in on slow speed for 1 minute, and then on high for 5 - 7 minutes.
6. Put into mixture into cupcakes cases and bake for 18 - 22 minutes.
7. Put on cooling rack for 10 minutes before putting the icing on top of each cupcake.

Teh Tarik Buttercream Frosting (For 7 cupcakes)
*I do not make a lot of icing because my family is health conscious. So I suggest you double the measurements if you want the usual yield as most recipes.
- 1/2 cup butter (room temperature)
- 1 1/2 cup sifted power/icing sugar
- 1 pack of Teh Tarik Mix (each pack was 40g)
- 4 teaspoon (about 1 tablespoon) of milk

Instructions:
1. Beat the butter for around 2 - 3 minutes to incorporate air until it becomes soft.
2. Gradually add icing sugar at low speed, and then medium speed for 3 minutes.
3. Add in one packet of teh tarik powder sachet bit by bit on low speed.
6. Add 3 - 4 teaspoon of milk and beat at low speed.
5. Increase speed to high for about 5 - 8 minutes to blend everything together.


Friday, 1 November 2013

Cooked: Dutch Macaroni Schotel


The finished product: Dutch Macaroni Schotel.
It is firm and soft (not gooey) on the inside, has crispy cheese layers all over, and tastes really good. Here's the recipe that I made to bake this amazing dutch dish today.

Dutch Macaroni Schotel
- 250g of macaroni
- 6 eggs
- 1 cup milk
- 1/2 cup cream (35% - 40% fat)
- 8 slices of cheese
- 150g of ham (about 6 slices)
- 150g of luncheon meat
- 1 yellow onion
- pinch of black pepper (1/2 teaspoon)
- pinch of white pepper (1/4 teaspoon)
- pinch of nutmeg (1/4 teaspoon)
- pinch of sugar (1/2 teaspoon)
- salt (2 teaspoon)

Directions:
1) Boil and cook the macaroni. (Takes about 18 minutes)
2) Whisk the milk, cream, and FOUR eggs together.
3) Sauteed the onion until light brown golden color. Add in the luncheon meat and fry it for about 2 minutes until the meat becomes more firm and slightly charred.
4) Put the macaroni in, and slowly stir.
5) Pour in the milk/cream/four eggs mixture. Add the salt, pepper, nutmeg and sugar into the sauce pan or wok. Mix well for about three to five minutes.
6) Add in 3 cheese slices that are cut into small pieces.
7) Whisk the 2 other eggs and add into the saucepan.
8) Grease your pot using butter or oil spray if you have.
9) Pour in everything from the saucepan into the pot.
10) Put 5 slices of cheese on top of the mixture. Cover with lid.
11) Bake it for 1 hour - 1 hour 15 minutes at 180 degree celcius.
12) Let it cool for a few minutes and enjoy :)


This picture above illustrate how your saucepan should look like with the sauteed onions, luncheon meat and macaroni, before adding in the wet mixture.


This picture illustrates how your saucepan should look like after adding in the cheese and additional whisked eggs. This should be the consistency and texture of the mixture before putting into the pot to bake.

Friday, 11 October 2013

Baked: Sturdy Whipped Cream Frosting


So apparently the cupcake icing was a hit among the people who ate the cupcakes: the sturdy whipped cream. I improvised the recipe myself because I dislike runny icing -- I mean, who does like it, right? The problem with this recipe is that I tend to agar (a Singaporean lingo, meaning 'estimate') my measurements and I just go along with the texture when I feel that it is acceptable. Nonetheless, I decided to post it because a friend requested (:


Sturdy Whipped Cream Frosting (For 9 Cups):
- 3 / 4 cup Nestle Cream
(I only use the thick part, not the runny watery thing inside the can)
- 2 1/2 cup of Icing Sugar
- 3/4 cup Unsalted Butter
- 1 teaspoon vanilla essence
- 1 teaspoon of rum *optional

It's also important to make sure that the butter is slightly cold, below room temperature and soft. This is the usual case for most whip cream frosting.

- Blend the butter on low-speed until becomes moist and soft
- Sift in the 2 cups of icing sugar bit by bit and blend on low speed (until it becomes fluffy)
- Add in vanilla essence and rum
- Add in Nestle Cream and blend on low speed
- Sift in left over icing sugar on low speed for 2 mins and med speed for 1 minute

the most important part here is to not over blend because the whole icing might separate and fail.

I'd also recommend adding in 1 cup of heavy cream (not low fat). This is because fat holds icing together to prevent it being runny. Have fun!